Like most other gardening/composting sites, 99% of the articles I write about assume you have a garden to make compost in. But the reality is billions of people live in a gardenless house or flat. The desire to compost often exists, but the space to do so using traditional methods doesn’t.
It’s true that you can compost with worms (or woodlice, or cockroaches, or even maggots!) but let’s face it – most people don’t want to. You can get electric composters, and the good ones work like a dream – but they’re expensive. You can use Bokashi composting – but you’re not making real, ready-to-grow-in compost.
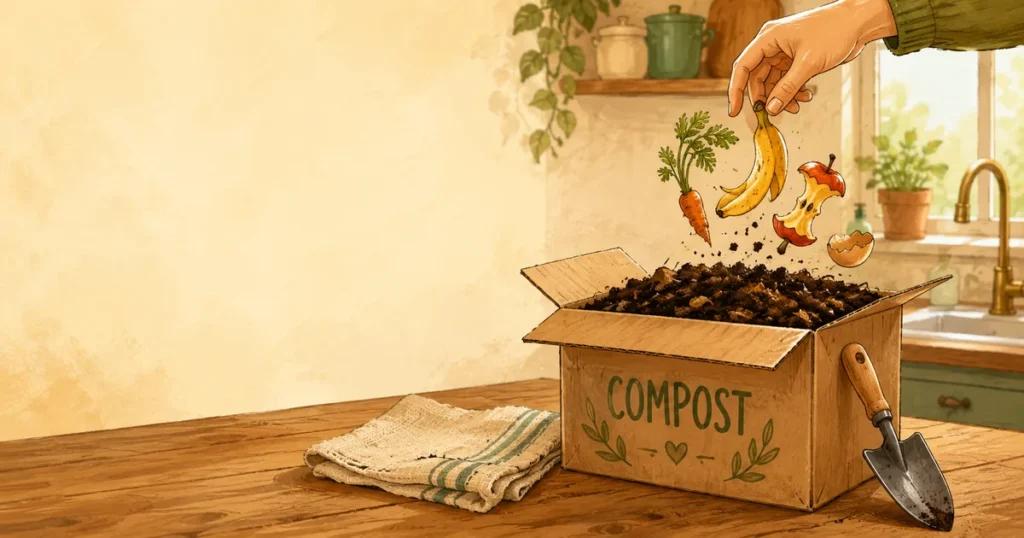
For that reason, I’ve been intensely interested in cardboard box composting. It asks very little of you in terms of space, equipment, or money and its proponents say it handles food waste with no smell and no pest problems.
The method originated in Japan, but some of the ingredients used are a little harder to obtain in the West. For that reason, I’ve been experimenting with easier to obtain materials.
I’ll talk about that – and the results – in a minute, but first let’s cover what it is.
(Note, I’ve sent several emails trying to find a Japanese expert to interview about this. I’ve had no luck so far, so the Japanese part of this is based on secondary sources. If you are an expert, please do get in touch with me via our contact page!)
What is cardboard box composting?
Cardboard box composting involves filling a cardboard box with specific materials that can then turn ordinary kitchen waste into compost – without smell or odour.
(The method is sometimes called the Takakura method, after Koji Takakura of the Wakamatsu Environment Research Institute in Kitakyushu, Japan. As far as I can tell, though, this is a confusion with a similar composting method which involves fermentation.)
Food scraps are added daily to a cardboard box packed with an absorbent base material. The base houses the microbes that do the work. Daily mixing keeps oxygen moving through the material while the cardboard allows oxygen to pass through the walls in a way that a plastic or wooden container can’t. The result is aerobic composting that stays dry enough and well-ventilated enough to produce little to no odour.
How to set up your (Japanese) cardboard box composter
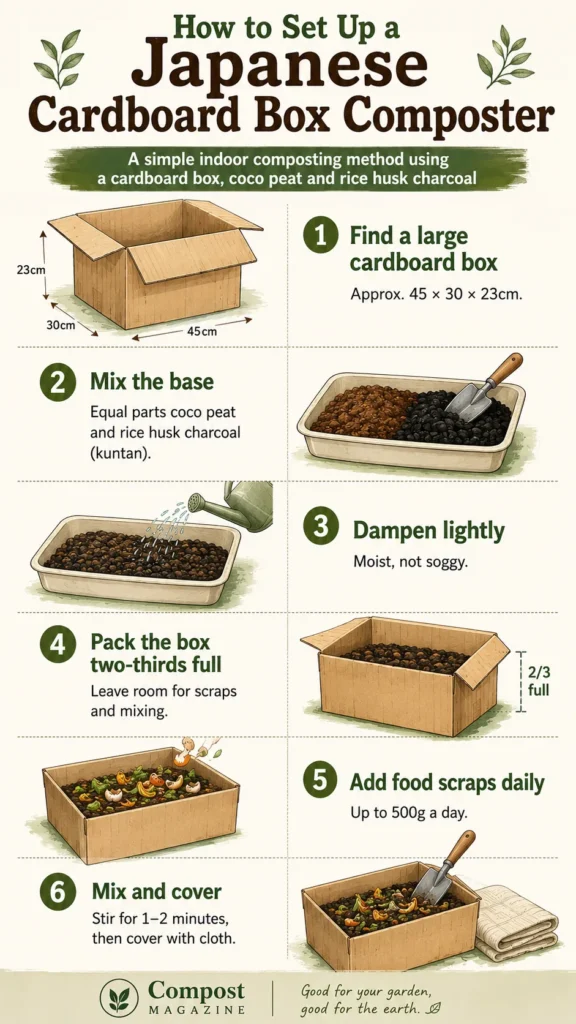
The standard setup calls for a large cardboard box, roughly 45cm x 30cm x 23cm (18″ x 12″ x 9″), though larger works fine. It needs to be sturdy, and boxes used for printer paper are often used.
I couldn’t find a printer box for my experiments, and while the one I did find was sturdy I was a little worried for a while when the sides went damp and I thought it might collapse. Fortunately, it dried out and has been fine ever since.
You need two base materials: coco peat (coir) and kuntan. More on kuntan in a moment. Mix them together in roughly equal parts, add water, and work it through until the mixture is evenly moist but not wet – it should hold its shape if you squeeze a handful, but not drip.
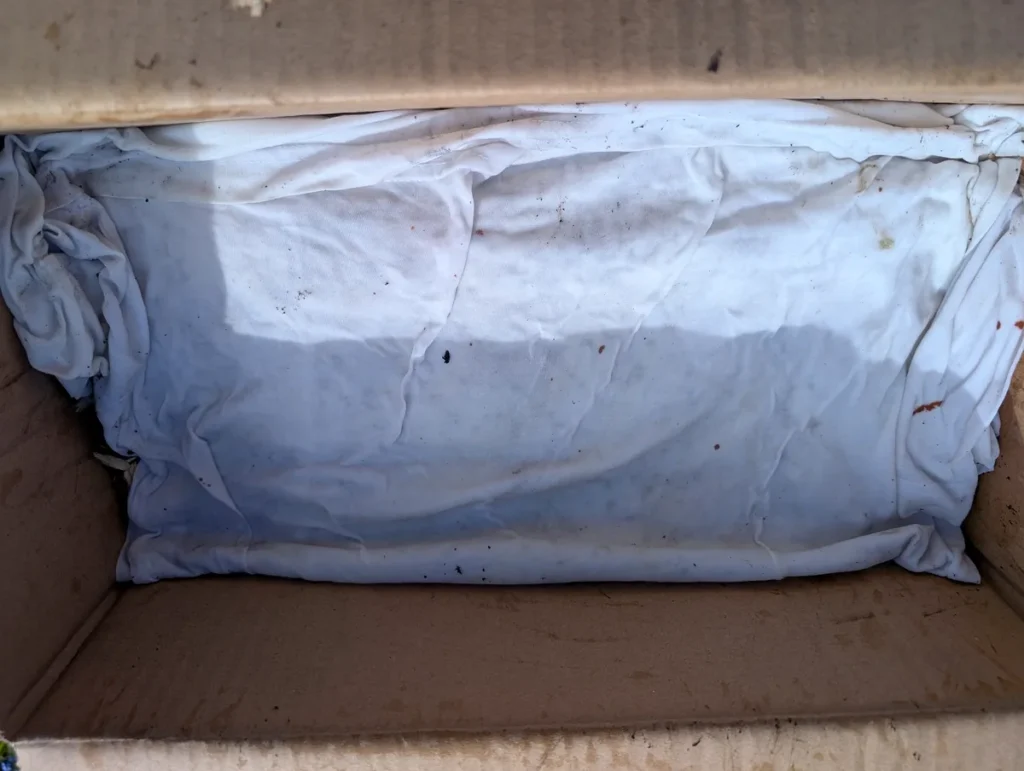
Pack the box about two-thirds full with this mixture. Cover it with an old T-shirt, tea towel, or piece of breathable cloth. The cover keeps moisture in and insects out, while still allowing airflow.
From there, the daily routine is straightforward. Add up to around 500g of food scraps, push them into the material, and mix everything with a trowel for a minute or two. That mixing introduces oxygen and breaks up any material that might be starting to clump. Replace the cover when you’re done.
The box will process material for roughly three months before it’s full. At that point, leave it to finish, start a new box, and after a few more weeks you’ll have finished compost ready to use.
A few practical notes: the box needs some airflow around it, so don’t push it into a tight corner. Avoid direct sun if possible, since this can dry it out faster than the microbes can handle. And the best location is wherever you’ll actually remember to use it daily – beside the kitchen bin, on a covered balcony, or in a porch.
The materials problem
The original recipe specifies kuntan as one of the two base materials. Kuntan is rice husk charcoal – a byproduct of rice production that’s cheap and widely available in Japan. Outside Japan, this can be difficult to find.
This matters because kuntan isn’t just a filler. It’s doing specific work: providing a porous structure that houses microbial communities, helping regulate moisture, and balancing the acidity that builds up as food waste breaks down.
Biochar performs much of the same function – the pore structure is similar, and it’s available from UK and US garden suppliers. Hardwood ash is sometimes suggested as an alternative, though I have seen less evidence that this is effective.
Coco peat, the other base material, is easier to source in both the UK and the US, although it’s still not something most people have sitting around. Which raises an obvious question: how rigid is the recipe, and what happens if you work with whatever you have?
My experiments so far (aka Welsh cardboard box composting!)
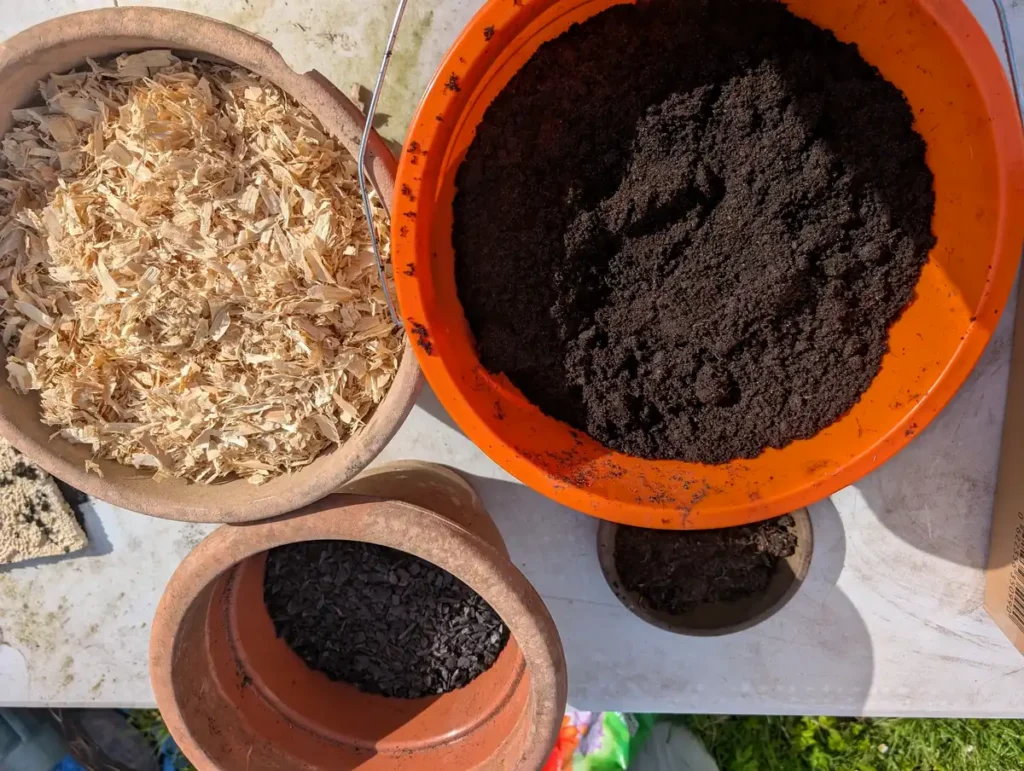
I’ve been running a test in my polytunnel (a hoop house, for US readers) with a modified base mix: roughly 50% bagged compost, 25% sawdust, and 25% biochar, as well as a handful of rougher compost from my pallet bins to introduce microbes.
(As I am based in Wales, I’m calling this Welsh cardboard box composting 😉 )
The first inputs were rice, vegetable scraps, and some paper. No meat yet.
On day five, I opened the box to find the rice hadn’t broken down much. The rice had clumped together and sat as a mass rather than mixing into the material. Once I broke it up and worked it through, things moved faster. By week two, there was no visible sign of the rice. The paper had mostly gone too, though not entirely, and there was still some visible onion skin.
There have been no smell problems and no signs of pests throughout – which were my two main concerns going in.
I’ve made a couple of mistakes. First, you may have noticed above that the process calls for the box not to be placed in the sun. My polytunnel gets hot, and the box can dry out quickly. I’ve now learned to give it a spray when I water my plants, but ideally this would be placed in a cooler spot. (Unfortunately, most of my cooler places are currently full of straw, gardening equipment or worm bins.)
Also, you’ll remember the instructions called for daily stirring, and the clumped rice on day 5 shows why! The good news is that there was no smell and everything did decompose, despite my lack of attention.
Whether that holds with more challenging inputs remains to be seen.
What I’m testing next
The first round of inputs was a cautious start. The more interesting test will be what the system does with more challenging materials – cooked food, oily scraps, and eventually meat, which most composting guides treat as off-limits but which this method is sometimes said to handle.
I’m also curious whether the base can be varied further. Using compost as a base ingredient is different, and it remains to be seen whether it is as effective as the original over the long term.
Wrapping up
I have to admit that I have been distracted by my other composting options, and with multiple worm bins, compost bins and tumblers to maintain, plus several composters under review, I haven’t given this as much attention as I should have.
That’s a mistake I aim to rectify, because cardboard box composting is a potential game changer. It removes three barriers – money, space and complexity – and for that reason it really should be talked about more than it is.